Tuesday, October 30, 2012

Sculpting With Primitives


Scott Spencer breathes life into a creature using ZBrush, a handful of brushes and a simple sphere.


.


..

Saturday, October 27, 2012

Interview With Weta Digital


ZBrush Artists Of The Week: Alex Oliver


http://www.alexoliver.com.br/index.html


ZBrush Video(S) Of The Week: Jesse Sandifer


Creature


Alchemy


An open drawing project

alchemy |’alkemÄ“

Figurative: a process by which paradoxical results are achieved or incompatible elements combined with no obvious rational explanation
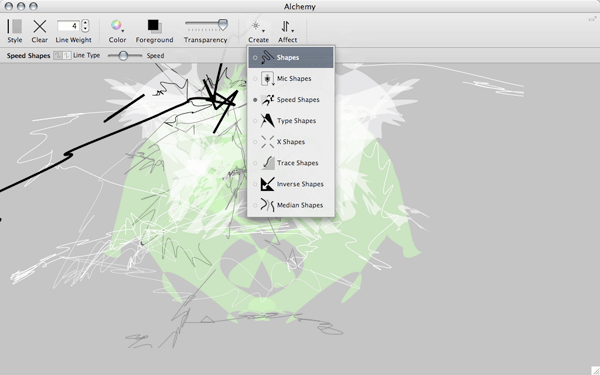
Alchemy is an open drawing project aimed at exploring how we can sketch, draw, and create on computers in new ways. Alchemy isn’t software for creating finished artwork, but rather a sketching environment that focuses on the absolute initial stage of the creation process. Experimental in nature, Alchemy lets you brainstorm visually to explore an expanded range of ideas and possibilities in a serendipitous way.   Alchemy is free: Down Load Here


Interaction

The Alchemy drawing canvas has an intentionally reduced level of functionality. No undo, no selecting, and no editing. Interaction focuses instead on the output of a great number of good, bad, strange and beautiful shapes.
To take a good look at what Alchemy can (and can not) do, check out the Videos section.
Alchemy Interface
The Alchemy Interface

Modules

Alchemy consists of a growing number of ‘modules’ that can be added or removed at will. Using a given module you can do things like:
  • Shout at the computer. Use your voice to control the width of a line or the form of a shape.
  • Draw ‘blind’. Turn off the canvas display and explore what shapes emerge from the ‘darkness’.
  • Create random shapes. Generate shapes that can be used as a starting point for characters, spaceships, or whatever shape you see in the ‘clouds’.
  • Mirror draw. Draw mirrored symmetrical forms in realtime.
  • Randomise. Mess up and distort shapes.

Global Features

Other global features place focus on the ‘process’ of drawing, letting you do things like:
  • Record a drawing ’session’. Automatically save the contents of the canvas to a page in a PDF file at set intervals.
  • Auto-clear the canvas. Start drawing on a clean slate at set intervals. Force yourself to start over fresh.
  • Switch the canvas. Automatically open your sketch in a more ‘conventional’ drawing application, either as a bitmap or vector file.
  • Avoid distraction. Alchemy has a very minimal interface, just a simple toolbar that dissapears magically, and a fullscreen mode to block everything else out.

Gallery

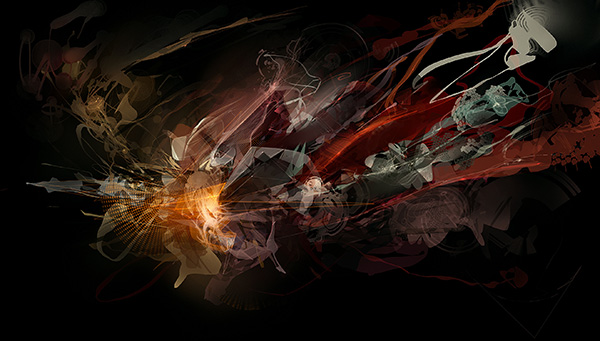
The gallery page displays imagery created using Alchemy as a starting point. Where possible displaying the original Alchemy sketch alongside the developed artwork. We will be adding more content to this page in the future, so take a look at the sketches forum to contribute and see what other people have been making with Alchemy.

Andrew Jones

An image that begun life in Alchemy using the ‘Trace Shapes’ module and was subsequently polished off in Andrew’s tool of choice, Painter X.
alchemical_wbb

Chris Waller

The ‘Doodle Bugs’ series by Chris Waller all originated from an Alchemy session file packed full of abstract forms, then transformed into critters using custom brushes in Photoshop.


Nicolas Francoeur

Jeffrey Lai


J4sonH4n


mr. mo


Sculpting The Face - Webinar with Ryan Kingslien


Sculpting With Primitives


Surface and Noisemaker

Image:Z4R2_Page51.jpg
An example of the NoiseMaker, used for most parts of this model, created by Geert Melis.
The Tool > Surface menu has been updated with a new user interface which brings more control to the noise management process.
Offset, Angle and Scale settings have been adding for each axis, allowing you to fine tune your surface noise.

Basic Control and NoiseMaker

Image:Z4R2_Page52.jpg
The NoiseMaker interface with its preview settings

To edit the noise you wish to apply to your model, click the Noise mode switch. If no noise has been dynamically applied to the model, the NoiseMaker window will open with its dedicated interface.
If noise already exists, the Noise switch lets you toggle its visibility.
To change your existing noise, click the Edit button. To completely remove your noise, click the Delete button.

Surface Noise and Textures

It is now possible to replace the default procedural noise with a texture.
By default, the texture will be applied as noise within the 3D canvas space. Alternatively, you can enable the UV option to apply the texture using your model’s UV information. Once applied, many of the surface noise settings can be used to adjust the texture in exactly the same way as for procedural noise.
To load a texture for use as noise, click the small white dot located at the bottom left of the preview window. A system dialog box will open, allowing you to browse for your desired texture.
Adjust the Scale, Strength or Color Blending settings to create different unique effects on your model. Scale, Offset and the Angle setting at the bottom of the window will have no effect on your image.

Image:Z4R2_Page53.jpg
A tile texture apply on the model with different scales. At any time, the result can be converted to move the model vertices and having the geometry affected by the Noise.

Notes: For better results, it is strongly advised that a texture used for noise be tileable and in 16-bit grayscale PSD format..
You will notice that the 2D and NoisePlug buttons currently do nothing. They will be enabled by a plugin which is planned for release sometime after ZBrush 4R2 launches. The Offset, Angle, and Scale XYZ sliders at the bottom of the popup window will also only work with that plugin. More information will be made available following ZBrush 4R2’s release.


Noise in Transparency with DymaMesh Sub Function

Noise applied to your model using the Tool > Surface > Noise function can be pure black in color so as to display partial mesh transparency. This transparency can then be used by DynaMesh to subtract those areas from the mesh. Simply double-click the Sub command.
In order to demonstrate this action, do the following:
  • Load the DynaMesh064.ZPR project from LightBox.
  • Open up the Surface sub-palette and click on Noise. A window will appear.
  • Click on the little circle in the bottom left corner to load a texture. (Alternatively, the Noise Plug-In can be used instead of a texture.)
  • Load checkered texture (Txtr03.PSD) from the ZBrush4.0r2/ZData/Textures folder.
  • Below the curve in the Noise window, move the Offset slider to a negative number.
  • The lower-left point in the graph will start to move up the curve. Move this point back down to the bottom corner of the graph.
  • Any part of the sphere that is under a black square will now become transparent. This is just a visual representation; the points are still present in the actual mesh.
  • To convert this visual effect into actual geometry, double-click the Sub button found in the DynaMesh menu.
Note: BPR can render the transparency without converting it to actual geometry. It is only necessary to perform the final step of double-clicking the Sub button if you wish to have physical holes that you will sculpt with.


QuickSketch

Image:Krol_QuickSketch.jpg
ZBrush Artist: Martin Krol
QuickSketch is a new 2D sketching feature designed to allow you to quickly rough out ideas inside ZBrush, just as you would sketch on the back of an envelope.

Contents

[hide]

Launching QuickSketch

Image:QuickSketch button.jpg
To get started, all you need to do is click the QuickSketch button. ZBrush will set up the canvas and pick a brush ready for you to start drawing. Symmetry is switched on by default but you can turn this off by pressing the X key or through the Transform palette (where you can also change the axis if you wish).
There are several new brushes especially designed for use with QuickSketch: you’ll find them in the Brush palette and their names all begin with ‘Pen’, such as Pen Shadow, Pen Sketch, Pen Fur and so on. Experiment to find out which best suits your style.

Erasing in QuickSketch

Select the PenSoft brush and paint over. Use the 'v' key to switch between dark/light colors.

Saving QuickSketches

QuickSketch is based on polypainting a 3D plane. This means that when you come to save your sketch, you have a couple of options. You can save it as a ZTool by pressing Tool>Save As; this method means you could load the sketch again to continue work on it later. Alternatively you can simply export the drawing as an image file by pressing Document>Export.
Note: You can also use the Pen brushes for polypainting your model, or even for sculpting (for which you will need to turn on ZAdd).

Leaving QuickSketch

When you have finished using QuickSketch you can quickly switch back to sculpting by:
  1. Select a model in the Tool palette.
  2. Switch to the Material of your choice (such as Matcap Red Wax) in the Materials palette.
  3. Set the active color to white in the Color Selector.
  4. Press ‘F’ or Transform>Frame (the Frame button on the right of the UI) to frame your model in the canvas.
  5. Select a sculpting Brush and continue sculpting.
Alternatively you can initialize ZBrush to its startup settings by pressing Preferences>Init ZBrush - but be sure to first save any files you wish to keep!


PaintStop

PaintStop is a sketching and painting plugin for ZBrush. The PaintStop brushes are designed to feel as natural as possible, and the interface to be simple and intuitive, speeding your workflow and unlocking your creativity.
Image:PaintStop_Interface.jpg

With PaintStop you can quickly sketch concepts for a new sculpt, work on illustrations for print or web, or simply have fun painting.


ZBrush Tutorials Creating a Vase


Saturday, October 20, 2012

Interview With Image Engine

To See How Image Engine Used Zbrush On The Thing

                                             Click Here!


Sculpting With Primitives


Strokes

While sculpting polymeshes in 3D you can use 6 different types of strokes: DotsDragRectFreehandColorized SpraySpray and DragDot. These can be used with the alpha sculpting feature.
Below, left to right; DotsDragRectFreehandSpray, and DragDot stroke types, sculpted onto a plane in 3D Edit mode. The DragRect stroke started at the center of the circle, and was dragged out; all other strokes started at the top left, and were dragged to the lower right.

Using DragDot

DragDot stroke allows you to drag your brush around, to place your sculpting or painting at a precise point. Only the area under the mouse when the drag ends is affected.
That's very useful for a case where you might want to have a company logo or some other bit of text stamped onto the model. For our example, though, we're going to get a bit more creative so that your imagination might be sparked to try even more interesting things.
We'll need these settings:
  • Brush:Std selected.
  • Alpha:Brush 09 (ring-shaped alpha) selected.
  • Stroke:DragDot selected.
  • Transform:Z on, to activate Z symmetry
  • Transform:(R) on, to activate radial symmetry.
  • Transform:RadialCount = 8.
  • Draw:Z Intensity = 80.
  • Draw:Draw Size = 64.
Now:
  1. Click Tool:Layer:New to create a layer that we'll edit on.
  2. Use Tool:Layer:Rename and change the layer's name to DragDotLayer.
  3. Click on the column and drag your stroke down to a point near the bottom as shown below.

Draw again to get this:
As you can see, this stroke allows us to very easily create an intricate pattern with only a simple alpha. What's especially nice about this stroke is how precise it is. You can place your alpha instance(s) in exactly the desired position.

Using Dots

This stroke draws a great many instances of the alpha very close together so that they blend into a single line. The closeness of each alpha to its neighboring instances is determined by how quickly you move the mouse. A slow stroke will create a uniform line (especially when lazy mouse mode is active), while fast movement will create a blotchy effect that is useful for some organic work.
For this example, we're going to use the stroke to add some rings around the column, separating it into sections.
Set:
  • Brush:Std selected.
  • Alpha:Brush 12 (ring-shaped alpha) selected.
  • Stroke:Dots selected.
  • Transform:Z on, to activate Z symmetry
  • Transform:(R) on, to activate radial symmetry.
  • Transform:RadialCount = 100.
  • Draw:Z Intensity = 20.
  • Draw:Draw Size = 5.
After everything is set up, just:
  1. Create a new layer by pressing Tool:Layer:New.
  2. Rename it by pressing Tool:Layer:Rename, call it DotsLayer.
  3. Draw some narrow rings around the column as shown in the following figure.

Keeping the same settings as above, set:
  • Draw:Z Intensity = 15.
  • Draw:Draw Size = 10.
Add a few more rings as shown in below. Don't be afraid to keep going over the same area to build up additional width or depth.
Now let's sculpt a bit of a design on the very top of the column.
Otherwise keeping the same settings as above, set:
  • Alpha:Brush 01 (ring-shaped alpha) selected.
  • Transform:RadialCount = 6.
  • Draw:Z Intensity = 35.
  • Draw:Draw Size = 20.
Now just three strokes will add the sculpting shown below.

Using DragRect

The Drag Rectangle stroke draws a single instance of the alpha, which may be rotated while dragging the stroke. The alpha is drawn with its center point being where the stroke begins. As you move the mouse away from the starting point, the alpha becomes larger. As you move the mouse around the starting point, the alpha is rotated.
Set up for drawing with:
  • Brush:Std selected.
  • Alpha:Brush 29 (three stacked arrows) selected.
  • Stroke:DragRect selected.
  • Transform:Z on, to activate Z symmetry
  • Transform:(R) on, to activate radial symmetry.
  • Transform:RadialCount = 6.
  • Draw:Z Intensity = 50.
  • Draw:Draw Size is irrelevant; the size is determined by your mouse movement.
  1. Create a new layer by pressing Tool:Layer:New.
  2. Rename it to DragRectLayer by pressing Tool:Layer:Rename.
  3. Now draw a stroke that begins a little below the upper set of rings. Drag straight down until the arrows almost touch those that are also being drawn to the left and right. When the size is right, move the pointer left or right a bit to ensure that the arrows point straight down along the shaft of the column, and release the mouse. The result will be as shown in the next figure.
  1. Repeat this just above the next set of rings down. Drag your stroke upwards to point the arrows toward the top of the column.
As you can see, the DragRect stroke type is perfect for stamping any sort of design onto the model. Another use would be with a speckled alpha to draw pores on a person's skin. Because you control the size and orientation of the alpha with every stroke, you can keep the stamps from repeating, thus preserving a naturally organic appearance.

Using Freehand

The Freehand stroke type is very similar to Dots, but gives you precise control over how far apart the instances of the alpha will be stamped.
Set:
  • Brush:Std selected.
  • Alpha:Brush 18 (ring-shaped alpha) selected.
  • Stroke:Freehand selected.
  • Transform:Z on, to activate Z symmetry
  • Transform:(R) on, to activate radial symmetry.
  • Transform:RadialCount = 6.
  • Draw:Z Intensity = 60.
  • Draw:Draw Size = 20.
  • Stroke:Spacing = 1, to cause individual applications of alphas to be mostly overlapped. (Higher values would result in less overlap.)
  • Stroke:Lazy Mouse selected, to result in smoother lines as you draw.

  1. Create a new layer by pressing Tool:Layer:New.
  2. Rename it to FreehandLayer by pressing Tool:Layer:Rename.
  3. Now draw a single line down the side of the column. It may help to rotate the model onto its side before doing this.
The Freehand stroke type is remarkably useful any time you want to draw lines of repeated detail. You could trace a line of rivets along the seams in an aircraft's panels, create cute little swirls of dots, etc.

Using Spray and Colorized Spray

These two stroke types splatter the model with semi-random copies of the alpha. There are settings to determine how far apart the alpha instances can be, how much they fluctuate in scale, how densely the instances are drawn (just a few scattered, or a lot), and how color is affected. The difference between the two stroke types is specifically in how each deals with color. Spray will cause the value of the currently selected color to fluctuate. Colorized Spray will affect its hue. Since we're strictly sculpting in this tutorial, the color modifications don't play a role and so we could use either stroke with exactly the same results. We'll just use Spray.
Set:
  • Brush:Std selected.
  • Alpha:Brush 04 (like a puff of cotton) selected.
  • Stroke:Spray selected.
  • Transform:Z off.
  • Transform:(R) off.
  • Transform:RadialCount = 6.
  • Draw:Z Intensity = 30.
  • Draw:Draw Size = 20.
  • Draw:Zsub = selected.

  1. Create a new layer by pressing Tool:Layer:New.
  2. Rename it to SprayLayer by pressing Tool:Layer:Rename.
  3. Now simply draw some damaged spots on the column.

The Spray strokes are a very powerful way to quickly create randomized organic detail. Don't forget that while we've used them strictly in a modeling capacity in this tutorial, they also work quite well with polypainting. That's where you'll really put the color features of these stroke types to good use.

.

Alphas

An alpha is a grayscale intensity map. It can be used to represent intensity, masking, and similar things. For example, bump maps and displacement maps (both in ZBrush and in other programs) are both alphas; the gray intensity represents the height or depth of the bump or displacement.
Note: ZBrush alphas are 16 bits in depth, which simply put means that they can produce much smoother gradations in gray, and hence wherever they used. Some other programs are limited to 8-but alphas, which can produce noticeable 'stairstepping' artifacts.
In ZBrush, alphas are used for much more than just bump or displacement maps. They can affect masking (which parts of an model or painting you work with), brush appearance, how colors, or materials are laid down, and the shape of sculpts. And probably a few other things I can't think of right now.
In addition, you can make your own alphas, and also turn alphas into other tools, such as Stencils (which are masking tools that offer a different, and powerful, set of capabilities).
Below, we describe the most common ways of obtaining and using alphas. We also give links to pages which describe material significantly related to alphas.
Note: The Alpha Palette details all of the controls found in that palette, but you will also find alpha-related controls in other palettes.

Using Alphas

  • Many of the standard drawing tools use alphas to control their shape. This affects the depth of pixols on the canvas.
A stroke and then a mouse click using the SimpleBrush (tool #2), and built-in alpha #30.
  • Alphas may be used with 3D sculpting brushes to affect the geometry of 3D models.
Alpha Brush 30 applied to a PolyPlane with the DragRect stroke.

Obtaining Alphas

First and obviously, ZBrush comes with a large selection of useful alphas, which can be selected from the Alpha Palette (menu) in the menubar, or from the popup inventory to the left of the canvas.
You can of course load your own images for use as alphas using the xxx in the Alpha menu. Colored images will be converted to grayscale.
Note: Some image file formats do not support 16-bit grayscales. If you load such files, you may get the stairstepping effect described earlier. When using external programs to create alphas, try to use one that offers 16-bit grayscales.
You may find it more convenient to simply paint a pattern on the screen, and then use the xxx control to convert it into an alpha. The depth of the scene you created will be converted to the alpha (color will be ignored). Since ZBrush supports 16-bit depths, you will get a true 16-bit alpha.
Note: Alphas are displayed as thumbnail images in the alpha popup chooser, but are always saved with the full dimensions of the source image from which they were created. To get a small alpha, you can paint it on a large canvas of the proper aspect ratio, and then reduce the canvas size before making the alpha. Alternatively, a large alpha can be useful when you want to repeatedly apply a lot of detail repeatedly over large areas.

Other Points

  • The popup that displays the current inventory of alpha functions similarly to other inventory popups, such as the Tool popup. For example, ZBrush can hold a maximum of 256 alpha at any given time. If you load or create more alphas than this, then each new alpha will replace the currently selected alpha. For more details on inventory behavior, see xxx.
  • A good library of very useful alphas is available as a ZBrush plugin at xxx.
  • Alpha are crucial for obtaining the very fine detailing for which ZBrush is known; See Projection Master.
  • If you need to rotate an alpha, you can convert the alpha to a Stencils Stencil, and use the stencil instead. Or, if it makes sense, you could simply rotate the model appropriately, and then apply the alpha.


ZBrush Artists Of The Week: Alex Alvarez

http://www.alexalvarez.com


ZBrush Video(S) Of The Week: Scott Spence

In this tutorial, Scott Spencer will show the sculpting process of his demonic creature bust, applying Hollywood model-making techniques to digital sculptures.


Wednesday, October 17, 2012

DAY FOUR RECAP: Sculpting With Primitives PT.1


1.Working with primitives.
2. Subtools.
3. Deformation pallet
4. Move, Scale, Rotate, and Draw.


Subtool Pallet


Deformation

Tool:Deformation Subpalette

Allows the deformation of primitive or polymesh 3D models in various ways.

Concepts

Whenever a 3D tool is selected, the Tool:Deformation subpalette becomes available. This can be used to apply deformations of many types (bending, skewing, flattening, etc.) to the selected tool.
Note: Deformations are applied to tools, not to things on the canvas; if you draw onscreen with a 3D tool but do not go 3D Edit mode, that drawn tool is considered a 'paint stroke', and deformations will not apply to it.
Deformations can be applied on any combination of the x, y, and z axes, as indicated by small letters in the top right corner of each deformation slider; these are the global coordinate axes, not those local to the object. (This point will become clearer when you read the procedure below.) When a letter is orange, that axis will be deformed by the amount set. Click an axis letter to toggle it on or off.
It's usually better to apply deformations to a tool before adding it to the screen, rather than after. This eliminates the need to go back and forth from 3D Edit mode, makes inventory control easier, and in general gives more predictable results. Here is the recommended procedure:
  1. Select the tool.
  2. Open the Tool:Preview subpalette and set the object up in the preview, relative to the global xyz axes, according to how you want the deformation to affect it. For example, if you want to stretch a cube into something that looks roughly like an elongated diamond, rotate it so that one point is that the top of the preview, the opposite point at the bottom, select only the y axis on the Size deformation, and go to the next step.
  3. Apply the deformation.
  4. Add the modified tool to the document.
Most deformation sliders reset to their middle position after the deformation is applied. Thus, they can be applied repeatedly, with cumulative effects. Also, most sliders can be dragged left or right, with opposite results depending on which direction you drag. Because of the way the deformations are applied, dragging in one direction and then an equal distance in the opposite direction doesn't always return the object to its previous shape. In such cases, you can use Undo (Ctrl+Z) to abandon changes.
Note: If you press Ctrl+Z without the model being drawn in an editable mode on the canvas, the result will be an Edit:Document Undo instead of an Edit:Tool Undo.
Also, you can apply all deformations on selected parts of an object by using masking, for an unlimited range of effects. See the section on masking.
Below are detailed descriptions of the controls in the Deformation submenu.

Controls

Unify: While editing an object, it is possible for the overall dimensions of the object to change, causing it to become too big or small to display properly within the preview window. By applying Unify, ZBrush uniformly scales the object to maintain an optimal size.

Mirror: Flips the object horizontally. Use this to make a horizontally symmetrical image with a 3D object; use Snapshot to “paste” one side, and then use Mirror to create the opposite image.
Offset: Moves the object along the x, y, or z-axis with respect to the center of rotation. This is the opposite of moving the center of rotation in the preview window, but has the same net result. Default is 0%. Range is -100% to 100%.

Rotate: Rotates the object about the X, Y, or Z axis, using the center of rotation. Default is 0. Range is -180 to 180.

Size: Scales the object up or down. Default is 0%. Range is -100% to 100%.

Bend: Bends the object around the in-out axis, creating a sharp corner. Uses the pivot point as the center of the bend. Default is 0%. Range is -100% to 100%.

SBend: Bends the object around the in-out axis, creating a smooth curve. Uses the pivot point as the center of the bend. Default is 0%. Range is -100% to 100%.

Skew: Adds a slant to the object about the in-out axis, creating a sharp corner. Uses the pivot point as the center of the skew. Default is 0%. Range is -100% to 100%.

SSkew: Adds a slant to the object about the in-out axis, creating a smooth curve. Uses the pivot point as the center of the skew. Default is 0%. Range is -100% to 100%.

Flatten: Flattens the object from the left or right edge to the center as viewed in the Image Preview window. The direction of flattening depends on which way you drag the slider. Default is 0%. Range is -100% to 100%.

RFlatten: Radial flatten creates cylindrical faces on the object around the selected axis or axes. It does this by adjusting all polygons that lie beyond the specified radius so that they lie against this cylindrical face. It doesn’t change the number of polygons that compose the object. Default is 0%. Range is -100% to 100%.

SFlatten: Spherical flatten creates spherical faces on the object around the selected axis or axes. It does this by adjusting all polygons that lie beyond the specified radius so that they lie against this spherical face. It doesn’t change the number of polygons that compose the object. Default is 0%. Range is -100% to 100%.

Twist: Applies a twist along the in-out axis as viewed in the Image Preview window. The direction of the twist depends on which way you drag the slider. Default is 0%. Range is -100% to 100%.

Taper: Tapers the object by scaling it successively smaller or larger from the top to the bottom, as viewed in the Image Preview window. Default is 0%. Range is -100% to 100%.

Squeeze: Squeezes or expands the object about the pivot point, depending on the direction you drag the slider. Default is 0%. Range is -100% to 100%.

Noise: Applies a noise effect to an object, giving it an uneven surface. Default is 0%. Range is -100% to 100%.

Smooth: Smooths an object, making the surface more even. Default is 0%. Range is -100% to 100%.

Inflat: Makes an object larger or smaller on all axes by pushing polygons out or in along their surface normals. This tends to produce smoother edges than simply scaling an object. Default is 0%. Range is -100% to 100%.

Spherize: Moves an object's polygons into a spherical shape when dragged to the right. When dragged to the left, can have a deflating effect. Default is 0%. Range is -100% to 100%.

Gravity: Adds a gravity (or anti-gravity) effect by moving polygons successively downward or upward, depending on their distance from the pivot point. Default is 0%. Range is -100% to 100%.

Perspective: Adds a perspective effect by scaling farther polygons larger and closer polygons smaller. Dragging to the left has the opposite effect. Default is 0%. Range is -100% to 100%.

]]
Morph: Enabled only when a morph target has been stored, you can use this slider to blend between an object's current geometry and its morph target. By setting this slider to a negative value you can exaggerate changes in the deformation by adjusting deformation away from its morph target.
Note: The polygon count must remain the same while deforming. Therefore you should not use Divide or Optimize sliders while a morph target is active.

Optimize: Intelligently reduces the number of polygons in an object while attempting to retain its shape. The more you optimize an object, the more detail it loses.

3D  Primitives


HOME WORK :  Due  October 18

Watch All Of The Making A Sword Video's

Due October 23, Make a Sword using methods in Making A Sword Video's


FOR NEXT CLASS:

Bring your 8gb flash drive